thanhcongcraft
Member
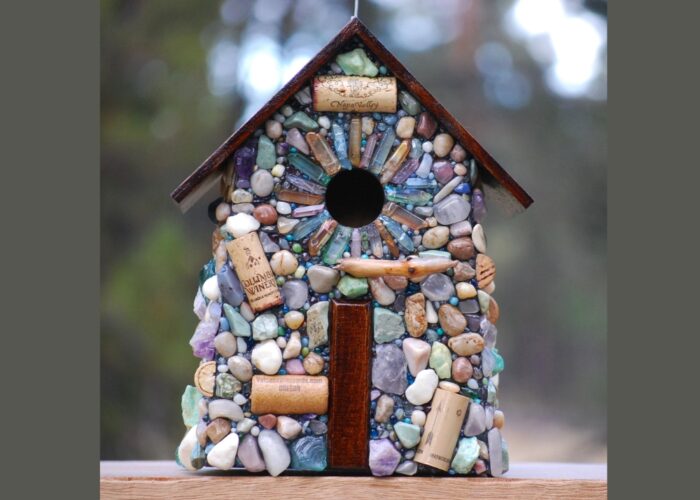
How to make mosaic birdhouses? Making mosaic birdhouses can be a fun and creative project. Here’s a step-by-step guide to help you get started:
Materials

Instructions
1. Prepare the Birdhouse
Materials
- Wooden birdhouse (store-bought or handmade)
- Mosaic tiles (glass, ceramic, or stone)
- Adhesive (mosaic glue or thin-set mortar)
- Grout (sanded or unsanded)
- Tile nippers or a glass cutter
- Sponge and bucket of water
- Safety gloves and goggles
- Paintbrush
- Sealer (optional)
- Pliers or tweezers
- Small trowel or spatula
- Scissors (if using mesh backing for tiles)
- Small containers for mixing grout

Instructions
1. Prepare the Birdhouse
- Clean the birdhouse to remove any dust or debris. If it’s painted or has a finish, you might need to sand it lightly to help the adhesive stick.
- Plan your design on paper or sketch directly on the birdhouse. You can create patterns, shapes, or even random designs.
- Using tile nippers or a glass cutter, cut your mosaic tiles into small pieces. Wear safety gloves and goggles for protection.
- Apply a thin layer of adhesive to a small section of the birdhouse using a paintbrush or spatula.
- Press the tile pieces into the adhesive, following your design. Leave small gaps between tiles for grout. You can use pliers or tweezers to place smaller pieces.
- Allow the adhesive to dry according to the manufacturer’s instructions, usually 24 hours.
- Mix the grout according to the package instructions. Apply it over the tiles using a small trowel or spatula, pressing it into the gaps.
- Wipe off excess grout from the surface of the tiles with a damp sponge. Be careful not to remove grout from the gaps. Rinse the sponge frequently and change the water as needed.
- Allow the grout to dry for the time specified by the manufacturer.
- Once the grout is fully dry, apply a sealer over the mosaic to protect it from the elements. Follow the sealer’s instructions for application and drying times.
- If your birdhouse has a perch or hanging mechanism, attach it according to the manufacturer’s instructions.
- Test Tile Placement: Before gluing, lay out your tiles to make sure you like the arrangement.
- Use Mesh Backing: For intricate designs, you can use mesh backing to hold tiles in place before gluing.
- Protect Work Area: Cover your workspace with newspaper or a drop cloth to catch any grout or adhesive spills.
